This page provides guidelines for collecting and uploading video data for sprints and runs over a 10-metre distance using SprintAI. You will find information on how to use the Forceteck Cam mobile app and the SprintAI web portal at sprintai.forceteck.com.
Watch & Learn
Pick the topic most relevant to you — each video walks you through a specific part of SprintAI.






Camera Setup
Positioning & Field of View
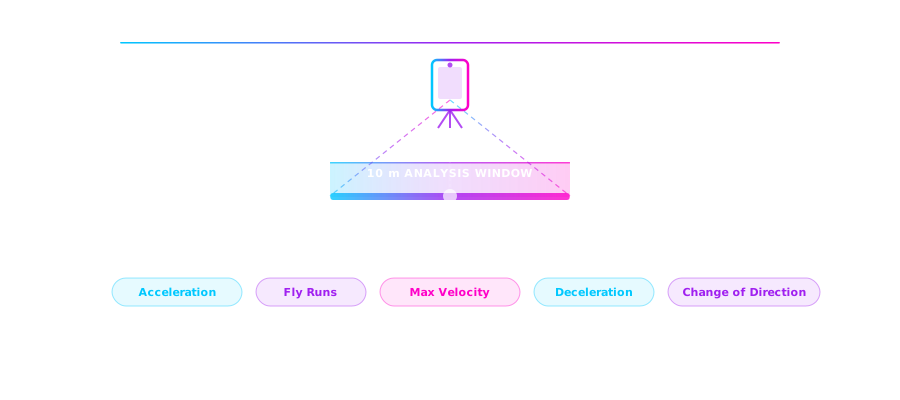
Your iPhone or iPad should be placed 10 metres perpendicular from the sprint line, covering a 10 metre analysis window. This works for any type of sprint — acceleration, fly runs, max velocity, deceleration, or change of direction. Simply position the device to cover whichever 10 m section is most relevant to your session.
Single Device Setup
Most sessions require just one device. Place it 10 m from the track, centred on the section you want to analyse.
Multi-Device Setup
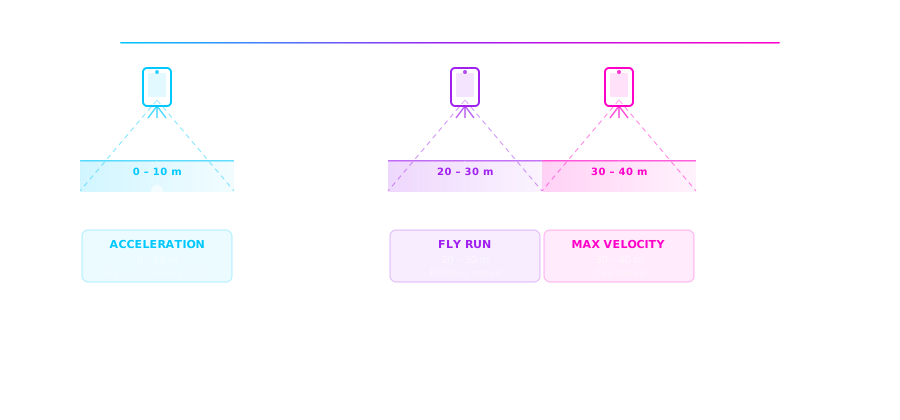
If you want to cover multiple sections of the run simultaneously (e.g. acceleration and max velocity in the same session), simply add one device per zone. Each device covers its own independent 10 m window.
Framing Guidelines
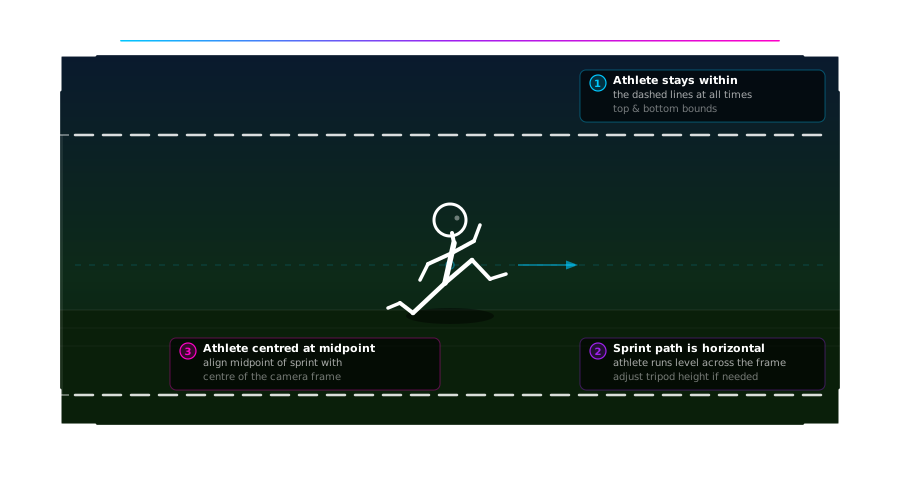
Ensure the athlete's sprinting path remains within the vertical bounds of the screen (between the top and bottom edges) throughout the recording. Ideally, the athlete should be as close to the vertical centre of the screen as possible.
Position the device so it is level with the plane of motion. Use background objects (lines, fences, or other fixed features) as visual guides to ensure the camera is perpendicular to the sprint direction.
Ensure the athlete is centred in the frame when they reach the midpoint of their sprint. Once set, do not move the device during or between runs in the same session.
Camera Settings (if not using Forceteck Cam App)
We strongly recommend using the Forceteck Cam App, which automatically records at 240 fps HD with no dropped frames. If you are using another device, apply these settings manually:
Sampling Frequency: 240 Hz preferred (120 Hz also supported)
Mode: Slow-motion video setting
Minimum required: 120 Hz — anything lower will compromise metric accuracy.
Forceteck Cam App
Log in using the same credentials (username and password) as the SprintAI web portal.
Creating a Session
Tap the folder icon in the bottom right corner to create a new session. Enter the session name, description, and optionally a scheduled time.
Enter the newly created session and tap the red camera icon to begin recording.
Set the recording parameters:
- Direction of Travel: L2R (Left to Right), R2L (Right to Left), or AUTO for automatic detection.
- Number of Runs: Total number of player runs in the session (players × reps), or leave on AUTO if unknown.
Good practice: Start and end each session with 10 seconds of empty video. Then ask the athlete to enter the field of view — this gives the trimming algorithm enough context to correctly clip the footage.
Uploading Your Video
After recording, your video is automatically saved to the Files app — no editing or exporting required. Videos are stored under On My iPhone / On My iPad → SprintAI_APP.
Why use the Forceteck Cam App? The app forces your device to record at 240 fps HD and ensures no frames are dropped. This is critical for accurate biomechanical analysis. Videos recorded outside the app may not meet these requirements.
8 Things to Avoid
These common mistakes can reduce the accuracy of your sprint analysis:
These can confuse pose estimation models by mimicking body outlines.
Avoid both near-side and far-side movement across the runner's path.
Additional bodies (staff, teammates, spectators) can interfere with detection and joint tracking.
Shadows from trees, buildings, or people impact body segmentation and landmark detection.
Windows, mirrors, and shiny floors can create ghost poses or confuse keypoint estimators.
Both overexposed and very dark environments prevent joints from being consistently tracked.
Diagonal or frontal angles compromise accuracy. Side-on (90°) is always ideal for sprinting.
Use high-contrast clothing — avoid black gear against a dark background or white gear against a white wall.
SprintAI Web Portal
1. Login
Log in at sprintai.forceteck.com using the username and password provided. These same credentials are used for the mobile app. On your initial login, and once a month thereafter, you will be prompted to verify your email address for security purposes.
2. Athlete List
Before processing any sessions, check that all relevant athletes are registered under Settings → Modify Athletes.
- To add a small number of athletes, click the + button and enter their name, photo (optional), height (in metres), and weight (in kg).
- To add a large number of athletes, use the CSV Upload option. Download the
example-athlete-list.csvtemplate, populate it, and upload.
3. Video Preparation
There are two ways to get videos into the system:
- a. From Forceteck Cam App: Sessions automatically appear under Video Preparation → Monitor In-Progress Session.
- b. Manual Upload: Click Upload Training Session and provide the session name, fps, and direction of travel if known. A recommended session name includes the week number, session type (e.g., Acceleration, Max V), and date.
FPS is critical. SprintAI is optimised for 240 fps or 120 fps slow-motion video. Videos at 60 fps or 30 fps may compromise metric accuracy and may require manual review.
Once uploaded, the video progresses through these states automatically:
- Trimming Queued → Trimming → Trimmed
4. Athlete Assignment
Before launching processing, assign an athlete to each trimmed run:
Click on the Trimmed video and identify who is running.
Select the athlete by clicking the round icon. If a run contains no usable athlete footage, leave it unassigned.
Click Complete. Processing starts automatically.
5. Results & Analysis
All metrics and analyses are available under the Results Overview page.
Athletes View
Squad Snapshot showing average Forceteck and Custom scores for each player across the last 5 runs. Sort by metric, monitor velocity trends, and click any athlete to build a custom performance dashboard over time.
Sessions View
Access all sessions with information on the week of collection and number of athletes. Drill into any session to review individual runs.
Advanced Analysis
Run Comparison: Step-by-step metric comparison across the same or different players.
Trend Analysis: Historical performance across multiple weeks, benchmarked against the team average.